There's been a lot happening in my life, and my poor blog has also suffered. But in my return to crafting, I've just uploaded a new Tutorial on how to crochet a "Triangle Bunny". I just know you will be smiling when you make one, they're so quick and easy why not make one for someone special? Let me know how you go. Thanks for your support.
Here's the CROCHET TRIANGLE BUNNY TUTORIAL ON YOUTUBE!
Showing posts with label Crochet. Show all posts
Showing posts with label Crochet. Show all posts
Monday, May 23, 2011


Wednesday, April 21, 2010
Crocheted Leafy Garland Tutorial
Hi Everyone! Welcome to my "Crocheted Leafy Garland Tutorial". This is my own original design, and is well suited to crocheters of all skill levels including beginners. Learn to crochet a pretty garland of leaves.
I've designed this project to work well with my 5-petal crochet flower tutorial, to make a unique floral garland.
Please enjoy; comments and feedback always welcome.
Wednesday, March 31, 2010
5-Petal Crochet Flower Button Tutorial


I found odd bits of yarn I probably would have thrown away were given a new lease of life. I've never been able to use so many odd buttons, it's been fun and they look good when no two are the same.
Here is my video Tutorial - I hope you enjoy this project. NOTE: It has been uploaded in HD, so details can be easily seen. Enjoy.
Wednesday, March 17, 2010
Tutorial - Crochet a 4-Leaf Clover (Shamrock)
Learn how to crochet your very own 4-Leaf Clover or Shamrock. These are great for St.Patrick's Day, as embellishments for scrapbooking. Sew a little clasp or pin on the back as a brooch. I hope you enjoy this tutorial, it also suits beginners. Cheers for now!

Monday, March 1, 2010
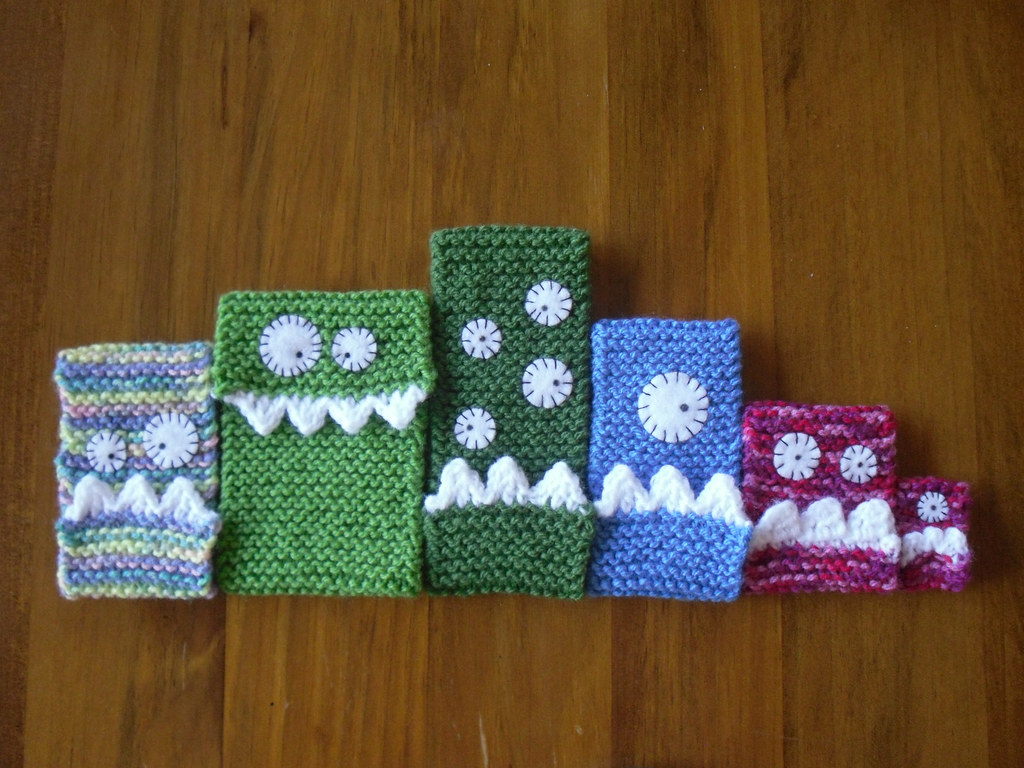
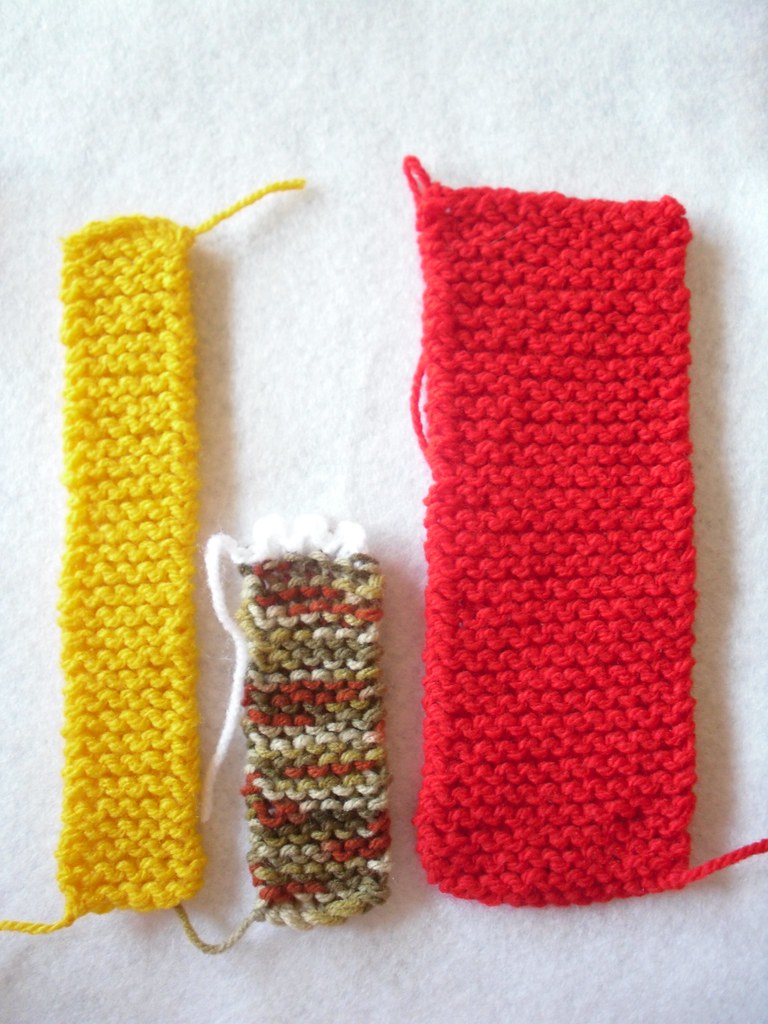
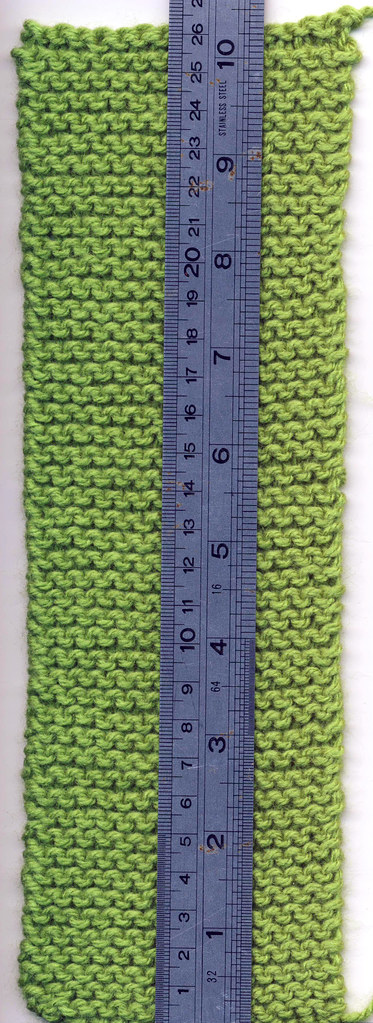
Tutorial - Knit your own Pocket Monster!
It's been a long time since my last post, but I'm ready for 2010. This was a few weeks in the making, and I'm very happy with these little guys. They're my new creation called "Pocket Monsters". You only need to know basic knitting, crochet and sewing skills to make them. I've created a 2 part tutorial on YouTube which I hope you enjoy.
Here are some pictures of the little guys, and when it comes to uses there are many, you're only limited by your imagination. Some ideas are:


Here are some pictures of the little guys, and when it comes to uses there are many, you're only limited by your imagination. Some ideas are:
- iPod cozy
- Book buddy
- Mug/cup cozy
- Brooch
- Bag


Thursday, May 14, 2009
Crocheted Corkscrew Tutorial
Have you ever been interested in how to crochet a corkscrew, spiral shape? Well, I've had some interest over the pictures I have just posted on Flickr so I've made a tutorial video for you to enjoy!:


Friday, May 8, 2009
The Sydney Hyperbolic Crochet Coral Reef

Ladies Silurian Atoll by the Institute For Figuring
Photo © IFF 2009, by Francine McDougall.
I have been invited to join the "The Sydney Hyperbolic Crochet Coral Reef Project" - and I'm very excited. I've been following with great interest the reefs set up around the world as part of the Institute for Figurings voice on the plight of coral reefs around the world, and just how important they are in our ecology.
The combining of Science, maths and Art is amazing, and I would encourage anyone to get involved, the Institute for Figuring's website is THEIFF
One of my Hyperbolic Crochets:


Wednesday, March 11, 2009
NEW How to Crochet a Layered Flower Tutorial Video
After much repeated interest and requests, I have finished Part 1 of the Crocheted Layered Flower tutorial Video, and loaded it onto YouTube. I am currently working on Part 2 (2 in total). It's very exciting and I would love to see people's Flowers when they finish them!! Enjoy.
Wednesday, February 18, 2009
10,000 Views!
Thank-you everyone for your support of my videos. I was very excited yesterday when my Animated Hyperbolic Video reached 10,000! I'm inspired to continue creating. Watch this space...Coming soon, how to crochet a 2 colour spiral.
Please check out my other crochet videos, including a video of a Hyperbolic Pseudosphere being made from start to finish. 152 minutes down to 5minutes! (Also - The new express 1 minute version)
Monday, February 9, 2009
Cat in the Hyperbolic Hat! (or Milly's TOO CUTE!!)

Well, I just couldn't help myself! Our cat Milly was having a cuddle, looking cute and happy with eyes shut, when I popped one of my Hyperbolic Crochet Creations on her head and snapped a photo. Then just to overdo the cuteness, I created this image....Cats - is there anything they can't make look cute??
Thursday, November 27, 2008
Crocheted Layered Flower - VIDEO TUTORIAL
I have blogged this before as a series of still images and written instructions here: Layered Flower .
*******UPDATE MARCH 2009 --->>>> CHECK OUT MY NEW TUTORIAL HOW TO CROCHET A LAYERED FLOWER - VIDEO ***********
Saturday, October 25, 2008
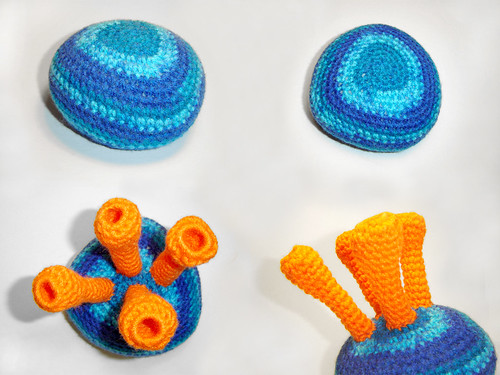
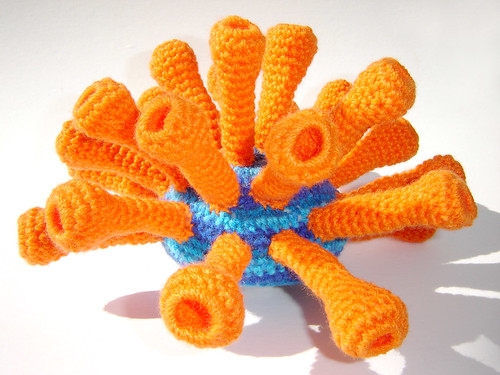
Crochet Coral Pebble
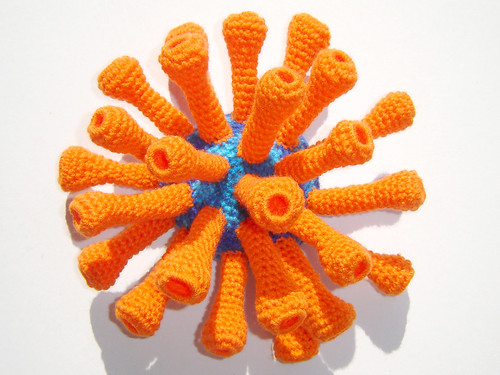
This is a piece I finished about a month ago. I wanted to create an underwater, coral piece. An imaginary organism, and have some fun with the colours too.

I began with a couple of the tendrils in orange as they worked so well. I realised I was going to need a 'base' for them to sit on, so I set about making a 'pebble'. The way I imagined this piece was a lot more densely packed, so the look of the base didn't seem as important originally. I'm glad I decided not to cut this corner and make a nice base, as most of it remains visible.

Saturday, October 18, 2008
We all need an Angel
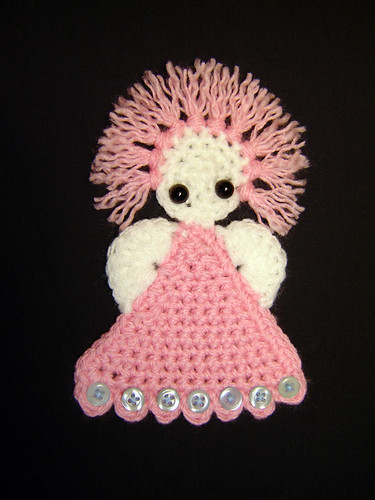
Well sometimes we just need a little help from above, when times are tough. So when you crochet a triangle - what a cute way to finish it off, by turning it into an Angel?
Done in DC (US = single crochet)- about 15 stitches. I then decreased at the beginning of every row, til I got to one stitch. I then DC (SC) stitched down each side of the triangle. To make the frilly hem on the bottom of the skirt, in each stitch:
DC(SC) then Half Treble(Half Single Crochet) then DC(SC) - repeat til the end of the hem. This gives the scalloped effect.
The face is a simple spiraled circle done in DC (SC), til about 3cm (1 1/2 in), a couple of whip stitches will hold it to the body. The Angel 'wings' are spaced like so:
attach yarn near 'neck', then miss 2 stitches, into the same stitch crochet 8 Trebles (Double Crochets) then miss 2 stitches and anchor wing with a single crochet. Repeat on other other side for opposing wing.
The hair is made from short lengths of yarn, (About 2-3 inches - 6-7 cm) in length - then 2 lengths are knotted through a stitch on the edge of the face (circle). I frayed the yarn to give it a more frizzy look.
Eyes are completely up to you. I was going to use fabric paint, but couldn't find any black, so I used little dome buttons instead. The buttons on the hem are an embellishment that finish it off nicely. If you make one, I'd love to see it, leave a comment or link to your Angel! (and a link back to this post would be appreciated too! Thanks...happy crafting!!
Tuesday, September 16, 2008
I'm on a Hyperbolic roll again!
Well...it had to happen sooner or later. I hadn't made any Hyperbolic Crochet for quite some time and I was missing the fun of creating these forms. If you haven't tried it yet you must! Have a look at the Institute for Figuring to get some background information, it's fascinating!

This is a multi-coloured Hyperbolic form, that I created by using 8ply yarn with a 4.5mm hook. I went with a bright centre, and had good advice to have a white 'rim' as a contrast. What amazes me is how the colour almost totally disappears when just one row of white is added.


I used a simple DC (Double Crochet = US Single Crochet) stitch, and increased every 2nd stitch. This made the form crenellate quite quickly, each row takes around 50% longer to complete than the previous row.
Here is another form I just finished, it's not as crenellated as the rate of increase I used was 1 in 3 stitches.


This is a multi-coloured Hyperbolic form, that I created by using 8ply yarn with a 4.5mm hook. I went with a bright centre, and had good advice to have a white 'rim' as a contrast. What amazes me is how the colour almost totally disappears when just one row of white is added.


I used a simple DC (Double Crochet = US Single Crochet) stitch, and increased every 2nd stitch. This made the form crenellate quite quickly, each row takes around 50% longer to complete than the previous row.
Here is another form I just finished, it's not as crenellated as the rate of increase I used was 1 in 3 stitches.


Sunday, August 31, 2008
The Eye has it - A crocheted eyeball!

Well it had to happen sometime! Somewhere in the deep dark recesses of my mind, this crazy idea popped into my head, and I just had to make it!

Purely for fun, as I can see no earthly use for it apart from a conversation starter ...or stopper, however you'd like see it!!

This "eye" is complete with "optic nerve", just to be as as anatomically correct as possible.

So....Get out your crochets hooks, your yarn and delve into the deeper, darker side of your craft psyche...you never know what you can make!!
"HERE'S LOOKING AT YOU!!!"
GO FORTH AND CRAFT... ;)
Monday, August 11, 2008
Crochet a Bubblegum Pouch gift!

How cute and fun is this? So my daughter's friend has been so sweet and considerate lately that I thought how nice it would be to make her a little thank-you.
I chose bubblegum coloured yarn (8ply) and a size 5mm hook (US - 8 - H). Crochet DC (single crochets -US) in the round increasing every 5 - 6 stitches until you have the desired base size (Approx 2-3 in or 5-7cm in the picture). Then stop increasing, this will make the "walls" of your little bag. After about 2 inches / 5 cm I started to decrease, about 1 every 8 stitches, to bring the top of the little bag in - just a bit!
Then you need to create spaces for the ribbon to be fed through. I simply crocheted into the next stitch, then chain one, miss one stitch then crocheted into the next stitch. repeat around edge of bag.
For the ribbon, I used 2 lengths, about 30 cm / 12 in works well to start and trim excess off.

This pouch is so simple to make, it would make a great party favour or suprise gift. Make it extra special, by popping something like sweets inside. Happy crocheting!
Tuesday, June 24, 2008
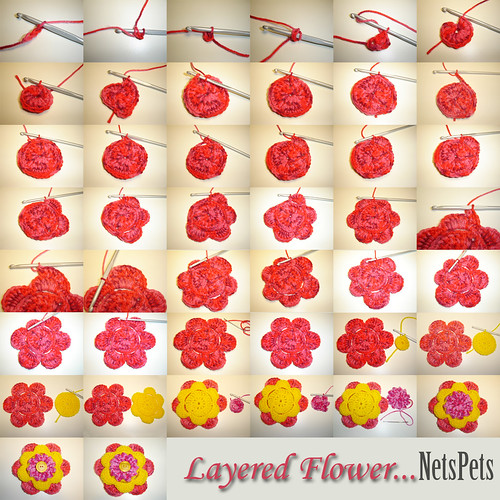
Tutorial - Crochet a layered flower.
Crochet a Flower Garden!
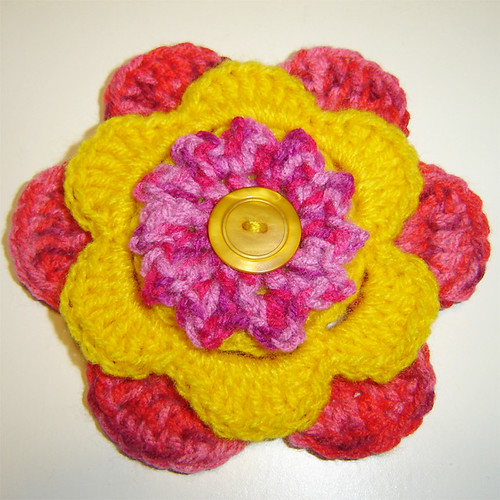
Why not? You have the yarn; you have the skills...do it! I call them layered flowers because they are made up of "layers" of crocheted 'rounds'. Simply collect some yarn (you don't need much) that goes nicely together.
If you have a basic understanding of crochet stitches, then it's best to start with a chain of 3 joined in a loop with a slip stitch. Make the first "florette" the largest in diameter, a simple one (as they are best made-up as you go) is to crochet into the centre of your loop 12 trebles (or US I think double crochets) this will give you a small circle about 2 1/2cm (1 inch) in diameter. Then add a row of; 1 single crochet, then 4 chain, then single crochet into the 4th stitch. Repeat till you have created 6 “buttonholes”.
Next row, petals. Each petal consists of “1 single crochet (DC), 1 half double crochet (half treble), 5 double crochets (5 trebles), 1 half double crochet (half treble), 1 single crochet (DC)”
*Note – this is where the 2nd “layer” ends. To make the biggest florette (layer) read on!
[Aust. Treble = US double crochet
Aust. DC = US single crochet] (confusing huh?)
Last row!! Each petal has 9 stitches now (7 “gaps”). I slip stitch 2 stitches between each petal, but whatever works for you best. The trick between petals is not to add any bulk/height.
Each petal: Into
1st stitch: 1 single crochet (DC).
2nd stitch: 2 half double crochet (half treble).
3rd stitch: 2 double crochets (trebles).
4th stitch: 1 double crochets (trebles).
5th stitch: 2 double crochets (trebles).
6th stitch: 2 half double crochet (half treble).
7th stitch: 1 single crochet (DC).
Repeat for each of the 6 petals. Finished!!
The centre “medallion” – is also worked the same as the centre of the petals. 12 double crochets (trebles). Then the 2nd row is worked as follows into each of the 12 gaps:
1 single crochet (DC)
1 half double crochet (Treble)
2 chain
1 single crochet (DC)
Repeat into each gap of the 12 stitches.
This forms your little “peaks”. All finished. Layer your petals on top of each other, and choose a pretty bright button and stitch your “layers” together. Your own, layered flower!!
(Note – In Australia the names of crochet stitches differ from the US and other countries. I have tried to write them correctly for both, please drop me a line if any of my instructions are unclear.)
*** UPDATE ***
I have made this into a video tutorial on my blog, HERE.
Tuesday, April 29, 2008
The wonderful world of craft!
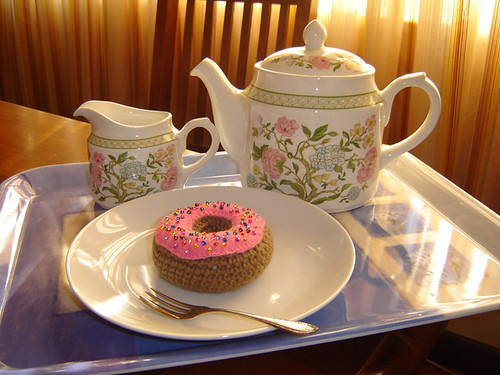
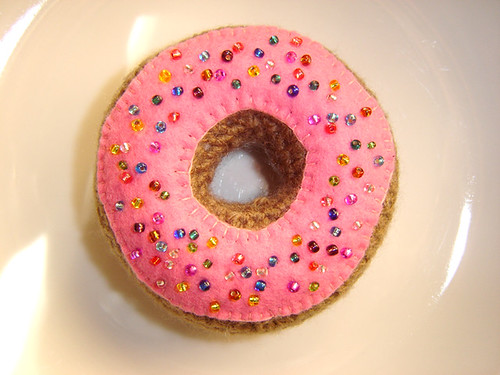
Hey there readers! I've been a busy little crafter - and thought you'd like to have a look at some of my latest creations. I used an 8ply acrylic yarn in brown. I started with a small chain loop, then single crocheted around increasing and decreasing till I achieved the desired shape. I used polyester fibrefill, and stitched it closed (in the centre). Here is a treat for your eyes, not your stomache!!


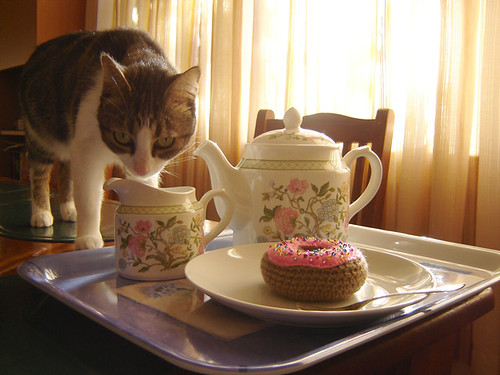
Even Milly got in on the act! (Where's mine?)

I'm also working on a new little "How-to" video for YouTube. It's a simple and effective crochet "shell" stitch. Bye for now!
Even Milly got in on the act! (Where's mine?)
I'm also working on a new little "How-to" video for YouTube. It's a simple and effective crochet "shell" stitch. Bye for now!
Saturday, April 19, 2008
How to Crochet a Pen Holder
Here is my new How to video on YouTube, "How to crochet a pen holder" - Have a look. I've tried to make it as simple and fun as possible. It's about fun - so change things up, and crochet! :)
Monday, April 7, 2008
Anyone for Chocolate Cake?


Well, wanting to push myself a little further with my knowledge of crochet stitches, I taught myself the "Popcorn" stitch. Then of course my first thought was, this would make a great slice of chocolate cake! Enjoy! Oh yea...NO calories, so it's guilt free!
Subscribe to:
Posts (Atom)