Crochet a Flower Garden!
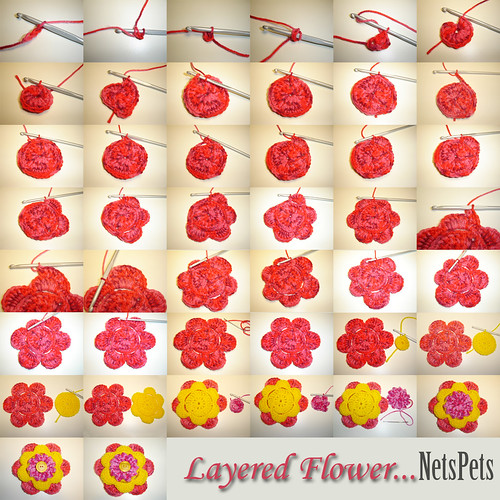
Why not? You have the yarn; you have the skills...do it! I call them layered flowers because they are made up of "layers" of crocheted 'rounds'. Simply collect some yarn (you don't need much) that goes nicely together.
If you have a basic understanding of crochet stitches, then it's best to start with a chain of 3 joined in a loop with a slip stitch. Make the first "florette" the largest in diameter, a simple one (as they are best made-up as you go) is to crochet into the centre of your loop 12 trebles (or US I think double crochets) this will give you a small circle about 2 1/2cm (1 inch) in diameter. Then add a row of; 1 single crochet, then 4 chain, then single crochet into the 4th stitch. Repeat till you have created 6 “buttonholes”.
Next row, petals. Each petal consists of “1 single crochet (DC), 1 half double crochet (half treble), 5 double crochets (5 trebles), 1 half double crochet (half treble), 1 single crochet (DC)”
*Note – this is where the 2nd “layer” ends. To make the biggest florette (layer) read on!
[Aust. Treble = US double crochet
Aust. DC = US single crochet] (confusing huh?)
Last row!! Each petal has 9 stitches now (7 “gaps”). I slip stitch 2 stitches between each petal, but whatever works for you best. The trick between petals is not to add any bulk/height.
Each petal: Into
1st stitch: 1 single crochet (DC).
2nd stitch: 2 half double crochet (half treble).
3rd stitch: 2 double crochets (trebles).
4th stitch: 1 double crochets (trebles).
5th stitch: 2 double crochets (trebles).
6th stitch: 2 half double crochet (half treble).
7th stitch: 1 single crochet (DC).
Repeat for each of the 6 petals. Finished!!
The centre “medallion” – is also worked the same as the centre of the petals. 12 double crochets (trebles). Then the 2nd row is worked as follows into each of the 12 gaps:
1 single crochet (DC)
1 half double crochet (Treble)
2 chain
1 single crochet (DC)
Repeat into each gap of the 12 stitches.
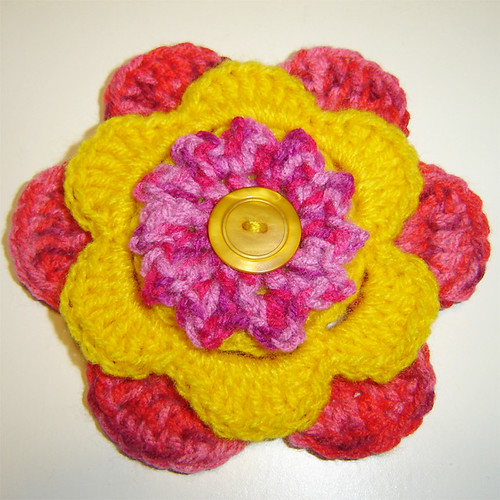
This forms your little “peaks”. All finished. Layer your petals on top of each other, and choose a pretty bright button and stitch your “layers” together. Your own, layered flower!!
(Note – In Australia the names of crochet stitches differ from the US and other countries. I have tried to write them correctly for both, please drop me a line if any of my instructions are unclear.)
*** UPDATE ***
I have made this into a video tutorial on my blog, HERE.
6 comments:
Oh, WOW, this is great!
As soon as I finish the little granny square flower garden blanket I am making I MUST do these!! I have two little girls that LOVE LOVE LOVE crochet afghans. They do not even use "blankets" or "quilts" anymore. Everything MUST be crocheted by mom!
Thank-you for your lovely comment. It's nice to know it's inspiring, I hope you enjoy making them for your little girls.
Hai,
I really like the flower!
Btw, I'm passing to you a blog award.
Come see it in my blog.
C ya!
Melisa
Thanks so much for sharing this.I'm a beginner,and I hope I can do this.
hi ... I personally really enjoy reading blogs like these, mainly because I like animals very much in fact I adore them. I would like to receive much more information about this topic.
HI.... Thanks for the tutorial..i'm beginner and want to learn crochet..hope i can make it...
Post a Comment